前因: 前面讲过用Travis CI自动部署,现在Travis CI不是很好用,发现github官方提供了GitHub Action,我们使用GitHub Action来实现CI/CD
1 配置私有库的Github Action
- 在hugo博客根目录下,创建放置Github Action配置文件的目录 .github/workflows/
- 在 .github/workflows目录下,创建一个yml文件,名称随意,这就是Github Action需要的一个工作流的配置,如果需要多个工作流可以创建多个yml文件
Hugo的官方文档Build Hugo With GitHub Action 中也推荐采用GitHub Actions作为持续集成部署方案,并提供了yml文件示例:
name: github pages

on:
  push:
    branches:
      - hugo  # action触发条件,push到 hugo 分支上时触发
  pull_request:
  # 如果使用自定义域名,还需要添加下面一行配置
  #cname: www.goodfun.me

jobs:
  deploy:
    runs-on: ubuntu-22.04
    steps:
      - uses: actions/checkout@v3
        with:
          submodules: true  # Fetch Hugo themes (true OR recursive)
          fetch-depth: 0    # Fetch all history for .GitInfo and .Lastmod

      - name: Setup Hugo
        uses: peaceiris/actions-hugo@v2
        with:
          hugo-version: 'latest'
          # extended: true

      - name: Build
        run: hugo --minify

      - name: Deploy
        uses: peaceiris/actions-gh-pages@v3
        with:
          personal_token: ${{ secrets.PERSONAL_TOKEN }} # 另外还支持 deploy_token 和 github_token
          #repository-name: wangzitao6/wangzitao6.github.io # 修改为你的 GitHub Pages 仓库
          publish_dir: ./public
          #publish_branch: hugo
2 配置合适的token
上述配置中有个参数 personal_token: ${{ secrets.PERSONAL_TOKEN }}
首先,需要生成一个Personal access tokens
- 在个人GitHub页面,依次点击Settings->Developer settings->Personal access tokens进入如下页面,记得要勾选下面两个scope: workflow 和 write:packages
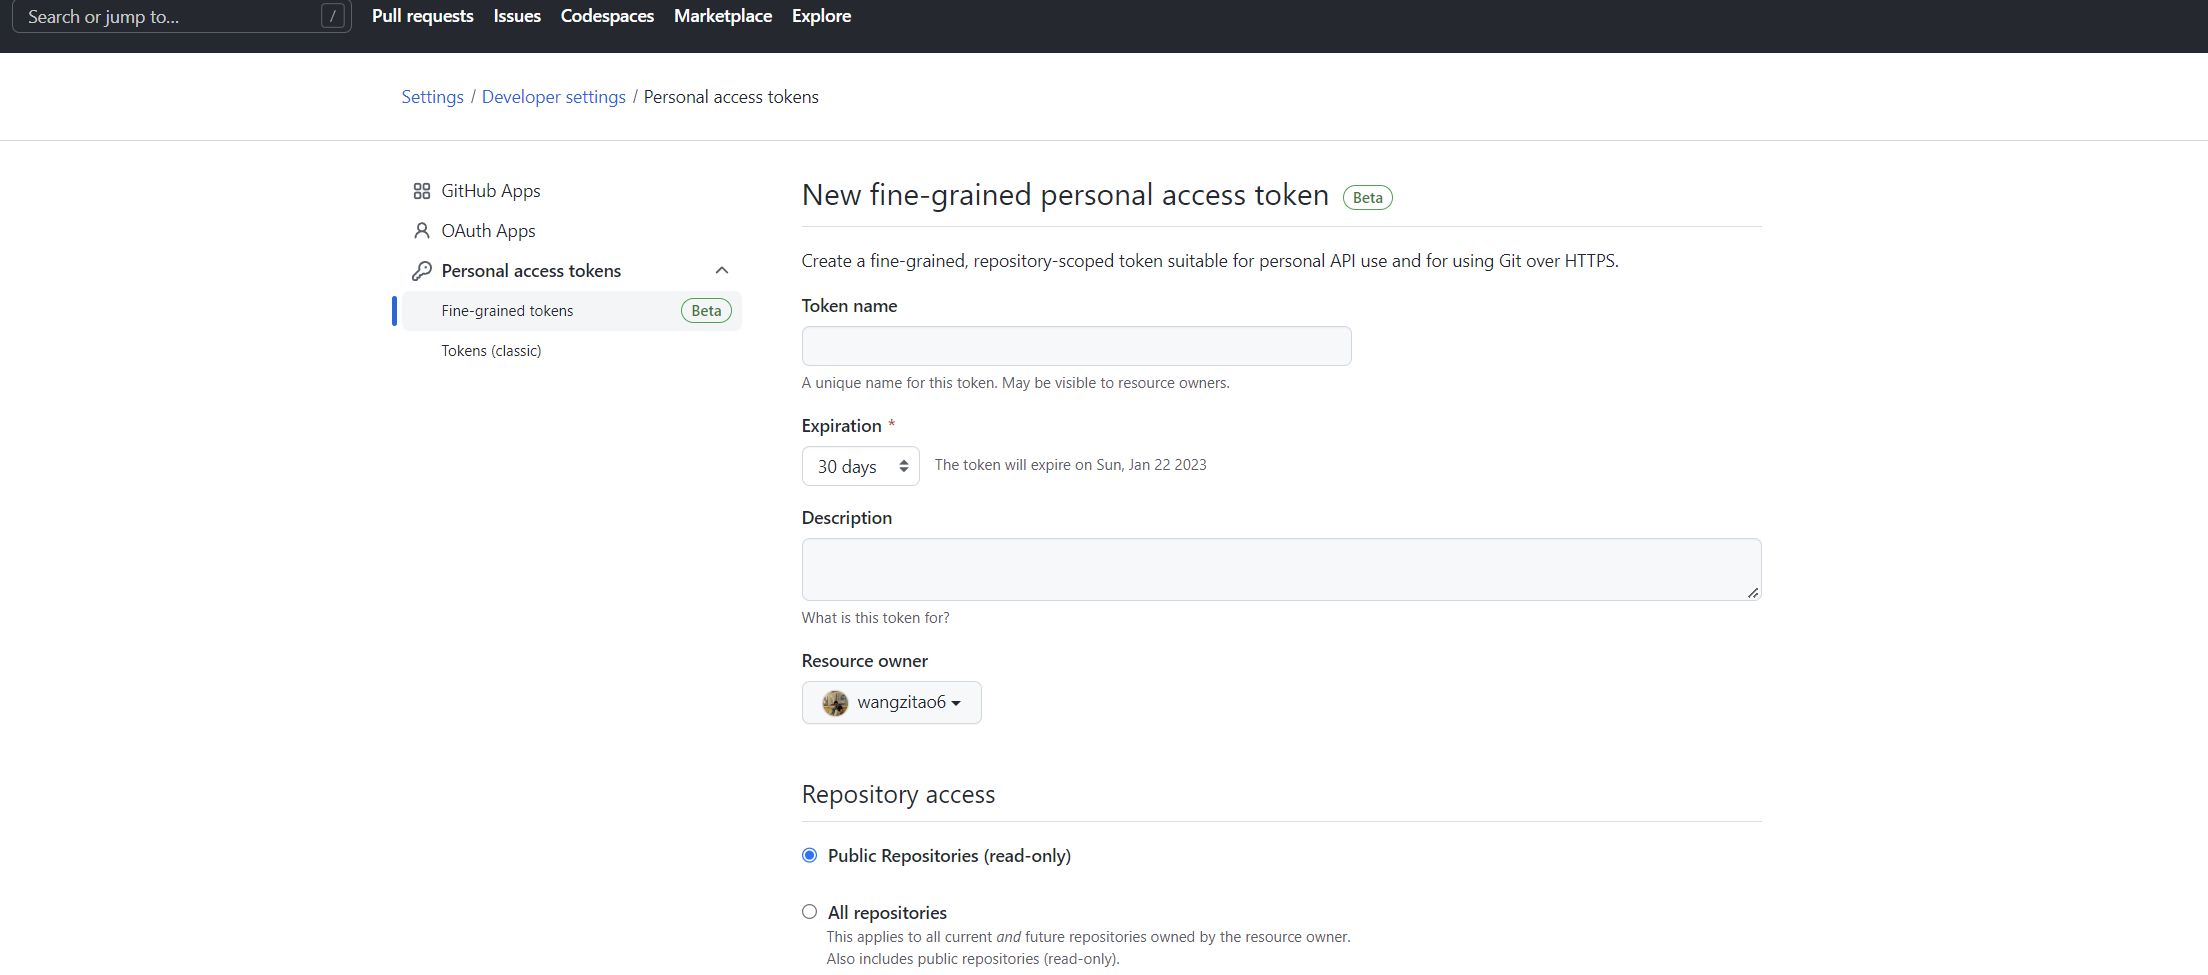
- 将生成的token复制出来为后续创建secret做准备,注意必须及时复制,一旦离开此页面后续就无法查看其值,只能重新创建新toke
- 进入对应的GitHub项目下,依次点击Settings->Secrets->Actions进入添加Action secrets的界面,点击New repository secret按钮
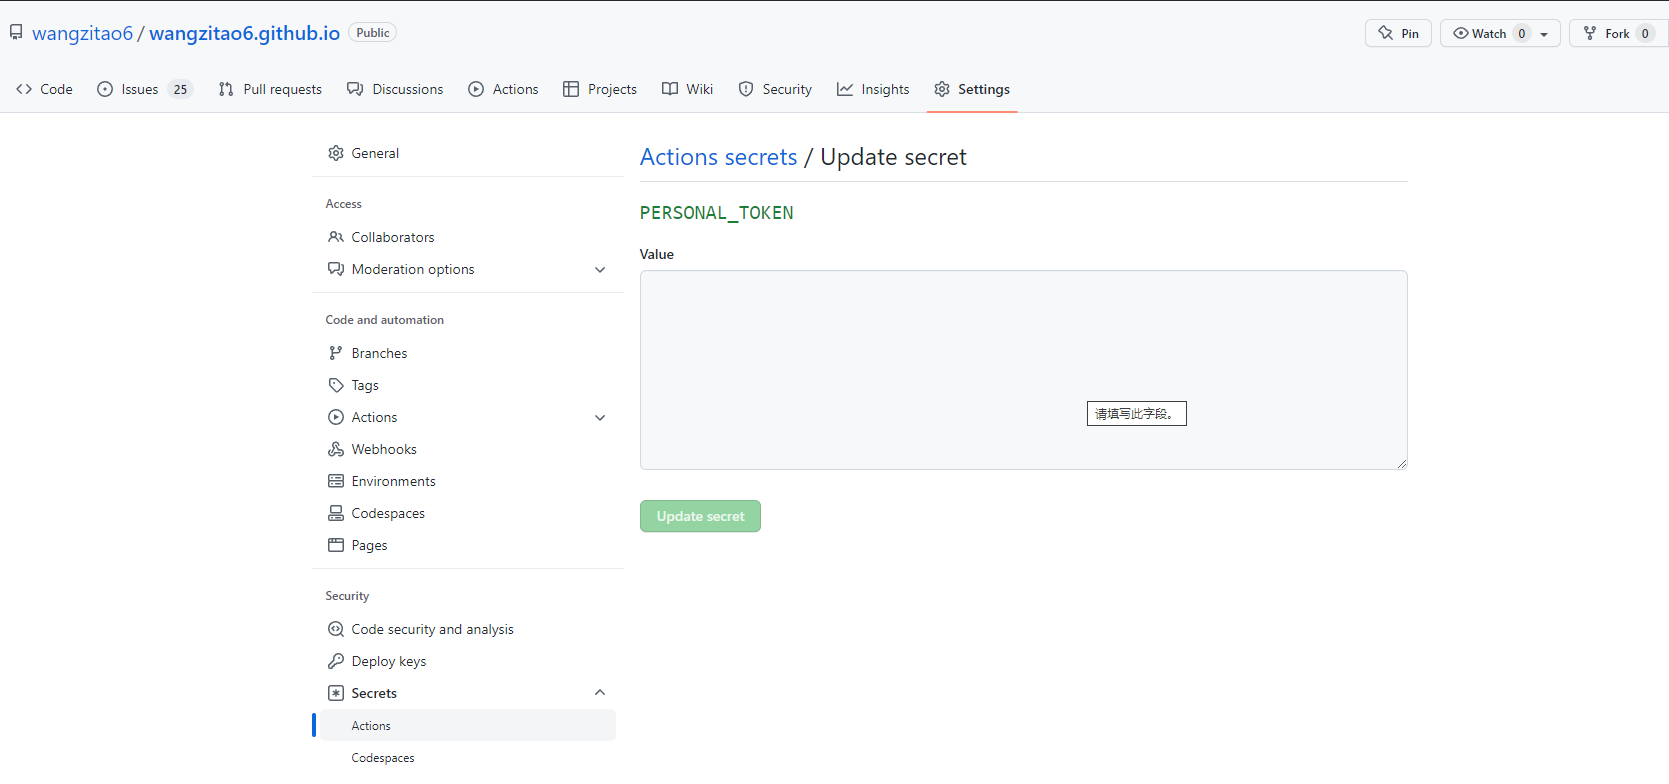
- 在流水线中将personal_token值设置为步骤5中secret的名称,类似${{ secrets.PERSONAL_TOKEN }}s,至此personal_token设置过程完毕
参考文献
github-pages-action
https://github.com/marketplace/actions/hugo-setup
comments powered by Disqus